As a busy Mummy to a little girl I often need quick and easy make-up that stays on really well through food fights, tears (mine and Nancy's) and the everyday mishaps that are part of the kind of days we have at home together when I am not working.
I did my make-up in 10 mins flat this morning whilst Nancy was amusing herself on our household trampoline (our bed) and I thought as I was doing this I would share with you the products I used and a quick overview of how I applied them.
Moisturiser: Oilatum Natural Repair
Foundation: Bourjois 10 Hour Sleep Effect ; colour 74 (apply with fingers and latex sponge to smooth)
Brows: Laura Mercier Eyebrow Pencil colour; brunette
Concealer: Laura Mercier Secret Camouflage colour; SC3 (only apply as spot/blemish cover-up)
Blush: Shiseido The Make-up Blush Duo colour; pink (rose nature)
Eyelash Curlers: Shu Uemura Curlers (curl top lashes)
Mascara: Leichner Waterproof mascara colour; Jet Black (3 coats top and bottom)
Powder: Origins Brighter By Nature Skin Tone Correcting Make-up colour; 4 Light/Warm (sweep a tiny amount over skin with a fluffy brush at the end of your make-up)
Remember this is a quicker than quick make-up. I didn't use any colour / pencil on my eyes as a good eyelash curler and 3 coats of mascara gives me that wide awake look. Put it this way, if I bumped into Ashton Kutcher in the street on my way to buy some eyelashes or nappies, I would feel groomed, confident and glowing and ready to accept a lunch date from him!
Showing posts with label london make up artist. Show all posts
Showing posts with label london make up artist. Show all posts
Friday, 23 September 2011

Friday, 19 August 2011
Three Products I Love At The Moment
This is just a short post to feature some products I currently love:
1) SANCTUARY Youth Boosting Warming Microbrasion Polish
http://www.thesanctuary.co.uk/youth-boosting-warming-microbrasion-polish-details.htm
I have used this 4 times now and already my skin looks newer, cleaner and polished.
2) Almond Oil
I buy this from Holland and Barrett and use it on damp skin (instead of body moisturiser)
as it is natural and really hydrating and CHEAP at around £3.00!
3) MANDARA SPA Island Paradise conditioning hand lotion
http://www.timetospa.co.uk/bath-and-body/hands-and-feet/Mandara-Spa-Island-Paradise-Conditioning-Hand-Lotion/
It smells utterly divine and the 300ml bottle will last ages. It was half price in Sainsbury's and I love it!!
1) SANCTUARY Youth Boosting Warming Microbrasion Polish
http://www.thesanctuary.co.uk/youth-boosting-warming-microbrasion-polish-details.htm
I have used this 4 times now and already my skin looks newer, cleaner and polished.
2) Almond Oil
I buy this from Holland and Barrett and use it on damp skin (instead of body moisturiser)
as it is natural and really hydrating and CHEAP at around £3.00!
3) MANDARA SPA Island Paradise conditioning hand lotion
http://www.timetospa.co.uk/bath-and-body/hands-and-feet/Mandara-Spa-Island-Paradise-Conditioning-Hand-Lotion/
It smells utterly divine and the 300ml bottle will last ages. It was half price in Sainsbury's and I love it!!
Megan's Wonderful Wedding
On 16th July 2011, I made up Megan for her wedding day in a lovely place called Bishampton, Worcestershire. I did Megan's trial in London about 6 weeks beforehand and within 2 hours we nailed her look. My brief was that she wanted to look summery and fresh, but with an element of glamour - which I hope you'll agree with when you see the picture below - we managed.
When I first met Megan I really thought she looked like Sienna Miller, what a lucky girl! Her skincare regime was really finely tuned and this showed in her skin as it looked and felt firm and hydrated. A great start for me as a make-up artist.....
Megan's wedding was at a local church in Bishmapton where her parents now live and her reception was in their fabulous garden. She wanted a summer garden party with a vintage feel and even though it rained all morning during the preparation and pampering - the sun shone for her at the right time. I always say the sun shines for good people and this was true for Megan and her then Fiance, Will.
Have a look at the pictures of Megan's wedding below. Her just got out of bed hair and her INCREDIBLE lace vintage style dress made her look a million dollars (which is probably what Sienna Miller would spend on her wedding!)
When I first met Megan I really thought she looked like Sienna Miller, what a lucky girl! Her skincare regime was really finely tuned and this showed in her skin as it looked and felt firm and hydrated. A great start for me as a make-up artist.....
Megan's wedding was at a local church in Bishmapton where her parents now live and her reception was in their fabulous garden. She wanted a summer garden party with a vintage feel and even though it rained all morning during the preparation and pampering - the sun shone for her at the right time. I always say the sun shines for good people and this was true for Megan and her then Fiance, Will.
Have a look at the pictures of Megan's wedding below. Her just got out of bed hair and her INCREDIBLE lace vintage style dress made her look a million dollars (which is probably what Sienna Miller would spend on her wedding!)
 |
| Making up Megan's Mum |
 |
| Starting on Megan (the sheet is covering her fabbo dress) |
 |
| Just us two and time for Megan to reeeelax |
 |
| Pretty much done, just the hair to finish |
 |
| Megan is ready. Gorgeous bridesmaid dresses aren't they? |
 |
| Wonderful image of the wind blowing Meg's veil |
 |
| Megan and Will |
 |
| In the vintage campervan! Super cool |
 |
| Not sure what she sang here, and is that Will on drums??? Lucy Baker Make-up |
Monday, 25 July 2011
Photoshoot for Sam Simmons
Sam Simmons is a Presenter and a Model and a very good one at that - she has masses of energy and a radiant smile and FABBO skin, which you will see in the images below. I have worked with her a few times and was delighted when she asked me to do her make-up for a recent portrait shoot with Philippa from Newland Portraits.
As Sam's skin is sooo great she didn't need much base or concealer and my job as a Make-up Artist was to enhance her natural beauty, not change it. See the pics:


Products I used on the shoot:
Skin: MAC Face and Body - C6 and 7 (mixed)
Laura Mercier Secret Camouflage Concealer - SC6 pallette
Brows: Benefit Instant Brow Pencil - Deep
Highlighter: BECCA Shimmering Skin Perfector - Topaz
Cheeks: NARS The Multiple - Maui
Eyes: MAC eyeshadows - mix of neutral colours
MAC Pro Lash Mascara - Black
Lips: mixture of lip colours from my existing palette
Powder: Laura Mercier Loose Powder - Translucent
As Sam's skin is sooo great she didn't need much base or concealer and my job as a Make-up Artist was to enhance her natural beauty, not change it. See the pics:


Products I used on the shoot:
Skin: MAC Face and Body - C6 and 7 (mixed)
Laura Mercier Secret Camouflage Concealer - SC6 pallette
Brows: Benefit Instant Brow Pencil - Deep
Highlighter: BECCA Shimmering Skin Perfector - Topaz
Cheeks: NARS The Multiple - Maui
Eyes: MAC eyeshadows - mix of neutral colours
MAC Pro Lash Mascara - Black
Lips: mixture of lip colours from my existing palette
Powder: Laura Mercier Loose Powder - Translucent
Friday, 8 July 2011
My Three Fave Products (July 2011)
I just wanted to post something about three products I am currently loving at the moment.
1) Boots No7 Cleansing Body Polish - I use this every 3 or so days with a tiny amount of water for the full exfoliating effect. It leaves the skin smelling incredible and there is no real need to body moisturise after use. Gorg.
2) First Aid Beauty : 5-in-1 Face Cream SPF30 - I love this cream. It smells nice, goes on really well and does so many miracle things! Unlike so many moisturisers with SPF it doesn't feel like a suncream and have that bitter smell that they tend to have. It doesn't have parabens or nasties in it either. Buy it in Boots.
3) Solar Oil - I always seem to be going on about Solar Oil, but it really is great. My nails are usually flaky and dry and with constant use of this oil, they aren't! Tip: you need to put it on as much as you can, morning / noon / night / after washing hands / after housework / bathing the kids etc - it will last ages so don't worry about it running out. Search online for the product or buy it at one of my fave online stores, Cult Beauty.
If you try them let me know what you think. Also, if you have any products that you currently love, let me know them too!
1) Boots No7 Cleansing Body Polish - I use this every 3 or so days with a tiny amount of water for the full exfoliating effect. It leaves the skin smelling incredible and there is no real need to body moisturise after use. Gorg.
2) First Aid Beauty : 5-in-1 Face Cream SPF30 - I love this cream. It smells nice, goes on really well and does so many miracle things! Unlike so many moisturisers with SPF it doesn't feel like a suncream and have that bitter smell that they tend to have. It doesn't have parabens or nasties in it either. Buy it in Boots.
3) Solar Oil - I always seem to be going on about Solar Oil, but it really is great. My nails are usually flaky and dry and with constant use of this oil, they aren't! Tip: you need to put it on as much as you can, morning / noon / night / after washing hands / after housework / bathing the kids etc - it will last ages so don't worry about it running out. Search online for the product or buy it at one of my fave online stores, Cult Beauty.
If you try them let me know what you think. Also, if you have any products that you currently love, let me know them too!
Thursday, 30 June 2011
Grow Baby Grow | HD Brows
Emily Ash of Browns Loughborough recently sent some products for me to try to help with my over-plucked / under-fashionable eyebrows and I am currently in the middle of a trial.
I'm testing out 'Grow Baby Grow' which is an HD Brows product formulated to help eyebrows grow back to their former glory - it encourages rapid growth by increasing blood circulation to the area and provides essential nutrients. As my eyebrows have taken a bit of a battering from my tweezers over the last..... oh gosh.... 18 years! I feel now is the time to give them some love and to show them I mean business.
The photos below show my eyebrows before using any of the product and four days afterwards. Over these four days I have made a thorough application twice a day making sure I cover the sparce areas carefully and painting on the clear gel above and below my natural eyebrow shape. The product has a really fine brush (almost like a liquid eyeliner brush) so application is easy and as it is a gel, it's not at all messy either.
I have a habit on this site of posting THE most unflattering photos of myself, but to see things properly sometimes it is necessary. I do think that my brows feel thicker, I really do, but is this because I am not tempted to pluck at all as this would jeopardise the test? - not sure. I wasn't really plucking them anyway as I have been trying for about 5 months to grow them, without much luck I must add, maybe Grow Baby Grow is working it's magic after just four days :) I will take a pic again in another four days and add it to this post but in the meantime, do you think my brows look thicker? (no make has been used on my brows at all).
After this trial is over, I think the next step for me is the full HD Brow treatment - I want to be tinted, waxed, threaded and plucked to perfection too, just like the celebs!
Four Days Later..........(8 days into trial)
They are definitely getting thicker. I have increased the application of Grow baby Grow to twice a day and will keep going. These pics show my brows with NO make-up and NO dye.
I'm testing out 'Grow Baby Grow' which is an HD Brows product formulated to help eyebrows grow back to their former glory - it encourages rapid growth by increasing blood circulation to the area and provides essential nutrients. As my eyebrows have taken a bit of a battering from my tweezers over the last..... oh gosh.... 18 years! I feel now is the time to give them some love and to show them I mean business.
The photos below show my eyebrows before using any of the product and four days afterwards. Over these four days I have made a thorough application twice a day making sure I cover the sparce areas carefully and painting on the clear gel above and below my natural eyebrow shape. The product has a really fine brush (almost like a liquid eyeliner brush) so application is easy and as it is a gel, it's not at all messy either.
 |
| Before ANY Grow Baby Grow Application |
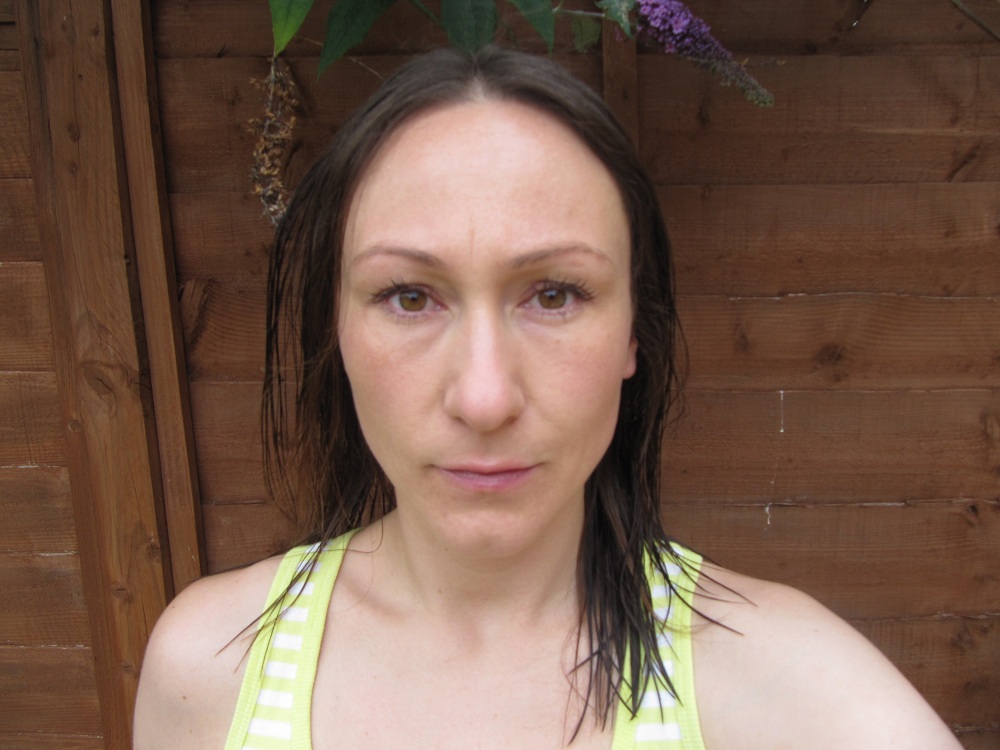 |
| Day Four of Grow Baby Grow Application (excuse the wet hair, I am a busy Mum!) |
After this trial is over, I think the next step for me is the full HD Brow treatment - I want to be tinted, waxed, threaded and plucked to perfection too, just like the celebs!
Four Days Later..........(8 days into trial)
 |
| 4 days later (same photo position and time of day) |
 |
| 4 days later (taken inside, shows brows in a better light) |
They are definitely getting thicker. I have increased the application of Grow baby Grow to twice a day and will keep going. These pics show my brows with NO make-up and NO dye.
A special THANK-YOU to Browns Loughborough.
Shiny Shellac from CND (Creative Nail Design)
This morning Rowena from Sei Bella Nails & Beauty came to my house to tackle my (and only I am allowed to say this) dry flaky finger nails and my VERY dry and neglected feet. After a consultation over email where I told Rowena I am a Mum to a busy toddler and a make-up artist where my hands need to look lovely and presentable she recommended Shellac nails for me and I jumped at the chance.
After the base coat she applied a layer of CND Shellac 'Cocoa' to each nail and each hand was placed under the UV lamp for 2minutes - the process was then repeated so that two coats of the coloured polish were on each nail. Even without the top coat my nails gleamed and glistened in the natural daylight.
Check out the final look. I totally love this colour, do you?
My toes were done in much the same way but instead of 'Cocoa' I opted for 'Wildfire' which is a vibrant but traditional red - see the images below
For the luxury pedicure Rowena used the following products in order. It was so wonderfully relaxing but could have been more relaxing if my 14m old toddler wasn't jumping all over me and Rowena and trying to hide all of her products!
CND Luxury Marine Spa Pedicure
1 - Mineral Bath Sea Soak
2 - For exfoliating legs - Marine Salt Scrub
3 - Exfoliating base of foot - Sea Scrub
4 - Solar Oil and cuticle eraser on nails and cuticles plus Sea Serum on hard skin patches
5 - Marine Cooling Masque
6 - Massage with Marine Hydrating Oil
7 - Cucumber Heel Therapy Cream to finish
I have to say as I sit here at my computer I can smell wafts of the CND Marine products that Rowena used and it is making me feel really relaxed. The foot massage skills that she has too are fantastic, she is firm but fair and I even stopped talking for about 4 minutes which means she really must have hit the spot!
One of the products that she used I already had and have recommended it to countless people over the years, this is Solar Oil. I buy this from Cult Beauty but there are lots of places online to get it from. It works so well with Shellac (which was new to me) as it penetrates through the formula and conditions your nails, it also conditions the cuticle area wonderfully. Rowena recommended buying a few tiny bottles of it (which she sells for £4 each) to keep in your bathroom, kitchen, handbag etc - this way you have no excuse for not applying it. I thought this was a simple but brilliant tip as I often can't find mine so I don't use it, hence the flaky dry nails I normally have. Solar Oil is £11.95 for a large bottle, but will last forever.
So if you live in London email Rowena at info@seibellabeauty.co.uk for a consultation and quote.
 |
| My nails before any treatment |
First of all Rowena gently filed my nails and attended to the cuticle area to create a smooth base for the Shellac to go on to. She then applied a coat of the CND Shellac base coat and this was allowed to set under the UV lamp for just 10 seconds.
 |
| Base coat has been applied and under the UV lamp for 10 secs |
After the base coat she applied a layer of CND Shellac 'Cocoa' to each nail and each hand was placed under the UV lamp for 2minutes - the process was then repeated so that two coats of the coloured polish were on each nail. Even without the top coat my nails gleamed and glistened in the natural daylight.
Check out the final look. I totally love this colour, do you?
 |
| CND 'Cocoa' - the finished look |
Watch this short video from CND about Shellac http://www.cnd.com/Products/Color/shellac-video.aspx
My toes were done in much the same way but instead of 'Cocoa' I opted for 'Wildfire' which is a vibrant but traditional red - see the images below
 |
| Ta-Daaaaa. My finished CND 'Wildfire' and luxury pedicure |
 |
| I think I need to tan my feet / legs now I have these fab nails :) |
CND Luxury Marine Spa Pedicure
1 - Mineral Bath Sea Soak
2 - For exfoliating legs - Marine Salt Scrub
3 - Exfoliating base of foot - Sea Scrub
4 - Solar Oil and cuticle eraser on nails and cuticles plus Sea Serum on hard skin patches
5 - Marine Cooling Masque
6 - Massage with Marine Hydrating Oil
7 - Cucumber Heel Therapy Cream to finish
I have to say as I sit here at my computer I can smell wafts of the CND Marine products that Rowena used and it is making me feel really relaxed. The foot massage skills that she has too are fantastic, she is firm but fair and I even stopped talking for about 4 minutes which means she really must have hit the spot!
One of the products that she used I already had and have recommended it to countless people over the years, this is Solar Oil. I buy this from Cult Beauty but there are lots of places online to get it from. It works so well with Shellac (which was new to me) as it penetrates through the formula and conditions your nails, it also conditions the cuticle area wonderfully. Rowena recommended buying a few tiny bottles of it (which she sells for £4 each) to keep in your bathroom, kitchen, handbag etc - this way you have no excuse for not applying it. I thought this was a simple but brilliant tip as I often can't find mine so I don't use it, hence the flaky dry nails I normally have. Solar Oil is £11.95 for a large bottle, but will last forever.
I would recommend Rowena without a doubt but I do have one very minor minor point to make: I do think that the edge of the nails could have been cleaned up a tiny bit more than they were so that there was no colour on the skin but I honestly don't think of this as a criticism of Rowena, I truly liked her and her work was good! I will post some more pictures of how they look after two weeks so you can see how they wear.
So if you live in London email Rowena at info@seibellabeauty.co.uk for a consultation and quote.
 |
| My daughter Nancy and Rowena The Shellac Queen! |
ONE WEEK LATER
Well, it's 8 days later and unfortunately due to the Shellac peeling off on 2 nails I had to remove it. The method I used was to soak a cotton pad with acetone (check the ingredient list on your nail varnish remover for acetone) for each finger, therefore x10. I wrapped the pad around each nail and wrapped it tightly with a square of tin-foil - it sounds a bit weird and it also looks a bit weird, I felt like Edward 'Tinfoil' Hands! Leave for 10 minutes. When the time is up, remove one of the wrappings and scrape off the Shellac using a wooden nail stick. If there are any stubborn bits of Shellac, use one of the already acetone soaked pads to gently wipe over the nail until it comes off. Repeat for each nail. After rinsing the hands with soap and water dry and generously apply Solar Oil to each nail and massage in. Do this as often as you remember for the next 48hrs.
Summary - I loved the look and feel of Shellac, but it didn't last for the 2 weeks. I used gloves for housework and applied the recommended Solar Oil at least 4 times a day, so I am not really sure what went wrong. It wasn't cheap either so I don't think I would have Shellac again in a hurry, I'm going to stick to my OPI and Barry M colours!
Sunday, 29 May 2011
M.A.C Half Lash Curler - do they work?
M.A.C Half Lash Curler

 |
| M.A.C Full Size Lash Curlers v M.A.C Half Lash Curler |
This morning I used them on myself. I am sure you all know that you need to use eyelash curlers without mascara so forgive my very plain un-made face on the pictures that follow. I have cropped the images so that I don't look too frightening for you!
 |
| My un-curled eyelashes |
 |
| Outer Lash Curling |
 |
| Inner Lash Curling |
 |
| The End Result - Curly or what?! |
I must admit my favourite eyelash curlers are the Shu Uemura ones which really curl and not kink the lashes. These half curlers do kink slightly, but they made me look SO awake it is hard to fault them. As I write this 7 hours later my lashes are still great -they have softened slightly with the weight of the mascara, which is a good thing.
This last pic was taken after the curling test, I added mascara to the bottom lashes so you can see the full effect.
 |
| My M.A.C'd lashes! (still with no make-up on - bit of gloss that's all) |
In answer to the question in my title - YES! THEY DO WORK.
The half lash curlers are available in M.A.C stores throughout the UK and online.
Price: £11.50
Saturday, 30 April 2011
Abbie's Wedding 28th April 2011
You might recognise this bride, I worked with her on the Cliff Barns Shoot which I posted on this blog a few weeks ago. She was one of the competition winners at Adamo Bridal Boutique who got to wear lots of amazing frocks and be photographed by Craig Williams Photography. Two weeks after the shoot I received an email from her asking me to do her make-up on her actual wedding day. I was delighted! She has the most amazing skin and bone structure and making her up is a real joy.

Abbie decided to have smoky eyes on her wedding day, pretty much identical to the ones we did on the shoot, but she wanted to have a more natural lip. We both agreed that the red statement lip was a little much for her particular wedding day look so we decided on a softer more wearable look. I didn't need to see Abbie for a trial as we had already done this at the shoot, so all I had to do was book my train ticket and a nanny for the day and that was it.
In terms of the make-up I used, below is a list of the products I used on Abbie. All of these are part of my professional kit and all products that I know well and love dearly....
Base: Chanel Vitalumiere - mix of 10 and 20
Highlighter: Boots No7 Skin Illuminator - peach
Eyes: Selection of MAC eyeshadows and Pixi Gel Liner - Onyx
Eye Liner: NARS Eyeliner Pencil - black moon
Lashes: False lashes by Eyelure
Mascara: Max Factor False Lash Effect Waterproof - black
Cheeks: MAC Blush - Peachykeen and Rimmel Natural Bronzer
Lips: MAC Lipstick - Spice is Nice + Lustreglass - Love Nectar
Powder: Rimmel Stay Matte Pressed Powder - transparent
Have a look how she looked in the getting ready stage and also with her wonderful dress on.


Beautiful?

In terms of the make-up I used, below is a list of the products I used on Abbie. All of these are part of my professional kit and all products that I know well and love dearly....
Base: Chanel Vitalumiere - mix of 10 and 20
Highlighter: Boots No7 Skin Illuminator - peach
Eyes: Selection of MAC eyeshadows and Pixi Gel Liner - Onyx
Eye Liner: NARS Eyeliner Pencil - black moon
Lashes: False lashes by Eyelure
Mascara: Max Factor False Lash Effect Waterproof - black
Cheeks: MAC Blush - Peachykeen and Rimmel Natural Bronzer
Lips: MAC Lipstick - Spice is Nice + Lustreglass - Love Nectar
Powder: Rimmel Stay Matte Pressed Powder - transparent
Have a look how she looked in the getting ready stage and also with her wonderful dress on.


Beautiful?
Tuesday, 26 April 2011
Is 'b.right' The Right Buy?
I was sent five samples from Benefit Cosmetics' new skincare range b.right before the bank holiday weekend and I have spent the last four days using them so that I can tell you what I think. The advertising campaign claims that the range is 'SO RADIANT, You'll need a dimmer switch' so I have put this to the test, will my husband need to wear his Raybans when I have cleansed, toned and moisturised?
I have photographed the samples so you can see the packaging and the containers they come in (please note these are sample sizes, not the size you would get in the shops plus excuse the bad lighting on the pics)


The first thing that struck me when I opened my post was the packaging. The boxes are designed to look fresh and clean, which makes obvious sense when inside them are moisturisers, cleansers and scrubs. Over the four days I ditched my usual trusty products and used the b.right range consistently morning and night so that I could really tell you how it worked for me. I have slightly dry / sensitive skin and as most of the products I was sent were 'For All Skin Types' I was comfortable with trying everything.
I used the FOAMINGLY CLEAN Facial Wash to start with. It smells lovely and you only need a small amount which quickly works into a good lather when used on damp skin. I found the cleanser really easy to wash off and my face didn't feel tight and overly cleansed after patting it dry. As I used it in the morning it wasn't removing make-up but the same night I used it to 'wash off the day' and it removed my make-up beautifully without stinging my eyes! I like.
After the Facial Wash, I went for the TRIPLE PERFORMING Facial Emulsion. As it is oil free it glides onto the skin well and sinks in well too, no slippery film was left after applying it all over my face. Don't make the mistake I made by applying it too near to the eyes - it has an SPF 15 in it and I must say it did sting, only my eyes though, not my face. A really lovely moisturiser that didn't feel greasy or too light for my dry skin.
That same night I cleansed with the Facial Wash again then used the REFINED FINISH Facial Polish. I am a sucker for scrubs and polishes but often they are too harsh and although initially they feel like they have whipped off the dead skin they tend to leave your face dry and sore, but NOT the b.right one. It has a very fine exfoliation within in and it left my skin feeling polished (as it say on the box!) and really soft. I always advise to exfoliate twice a week and it says this on the packaging, so if you follow this rule, your skin will be gleaming. I really like.
After the polish, I added IT'S POTENT Eye Benefit Cream all around my eyes. It feels cold when you apply it which is always lovely for an eye cream and it is absorbed by the skin really nicely. It says that it fades dark circles, but after one application I couldn't see much difference. However, you need to use something like this for about 2 weeks to see a real change, so I will report back on how it has worked for me, but in the meantime it does feel lovely to use and again, it smells gorgeous.
I ended the process with the TOTAL MOISTURE Facial Cream which I love! This one is for Normal to Dry Skin and the texture of it is creamy but not too thick. It soaks in really well and leaves a highly mosturised face, ideal as a base for foundation or tinted moisturiser. After four days of using this cream I think I am converted. It is scented but not too scented, which I like, and a little goes a long way which I really like.
The two products I want to rush out and get would be the REFINED FINISH Facial Polish and the TOTAL MOISTURE Facial Cream, both I would happily add to my own bathroom cabinet and my pro make-up kit. The others are great too, but if I had to pick it would be the two above.
Going back to the statement by Benefit 'SO RADIANT, You'll need a dimmer switch' - I think there is some truth in this to be honest. If used regularly and as directed on the box, you will need to ask your friends and family to pop on their sunnies to avoid being dazzled!
Buy the products here from the Benefit UK website prices are on the links too.
I have photographed the samples so you can see the packaging and the containers they come in (please note these are sample sizes, not the size you would get in the shops plus excuse the bad lighting on the pics)


I used the FOAMINGLY CLEAN Facial Wash to start with. It smells lovely and you only need a small amount which quickly works into a good lather when used on damp skin. I found the cleanser really easy to wash off and my face didn't feel tight and overly cleansed after patting it dry. As I used it in the morning it wasn't removing make-up but the same night I used it to 'wash off the day' and it removed my make-up beautifully without stinging my eyes! I like.
After the Facial Wash, I went for the TRIPLE PERFORMING Facial Emulsion. As it is oil free it glides onto the skin well and sinks in well too, no slippery film was left after applying it all over my face. Don't make the mistake I made by applying it too near to the eyes - it has an SPF 15 in it and I must say it did sting, only my eyes though, not my face. A really lovely moisturiser that didn't feel greasy or too light for my dry skin.
That same night I cleansed with the Facial Wash again then used the REFINED FINISH Facial Polish. I am a sucker for scrubs and polishes but often they are too harsh and although initially they feel like they have whipped off the dead skin they tend to leave your face dry and sore, but NOT the b.right one. It has a very fine exfoliation within in and it left my skin feeling polished (as it say on the box!) and really soft. I always advise to exfoliate twice a week and it says this on the packaging, so if you follow this rule, your skin will be gleaming. I really like.
After the polish, I added IT'S POTENT Eye Benefit Cream all around my eyes. It feels cold when you apply it which is always lovely for an eye cream and it is absorbed by the skin really nicely. It says that it fades dark circles, but after one application I couldn't see much difference. However, you need to use something like this for about 2 weeks to see a real change, so I will report back on how it has worked for me, but in the meantime it does feel lovely to use and again, it smells gorgeous.
I ended the process with the TOTAL MOISTURE Facial Cream which I love! This one is for Normal to Dry Skin and the texture of it is creamy but not too thick. It soaks in really well and leaves a highly mosturised face, ideal as a base for foundation or tinted moisturiser. After four days of using this cream I think I am converted. It is scented but not too scented, which I like, and a little goes a long way which I really like.
The two products I want to rush out and get would be the REFINED FINISH Facial Polish and the TOTAL MOISTURE Facial Cream, both I would happily add to my own bathroom cabinet and my pro make-up kit. The others are great too, but if I had to pick it would be the two above.
Going back to the statement by Benefit 'SO RADIANT, You'll need a dimmer switch' - I think there is some truth in this to be honest. If used regularly and as directed on the box, you will need to ask your friends and family to pop on their sunnies to avoid being dazzled!
Buy the products here from the Benefit UK website prices are on the links too.
Friday, 15 April 2011
Cliff Barns Bridal Shoot - March 2011
OK this isn't make-up or beauty advice but I wanted to share a really great photoshoot with you.
Back in March I was lucky enough to work with Craig and Kate from Craig Williams Photography on a shoot at Cliff Barns in Norfolk. Lauren from Adamo Bridal provided some stunning bridal wear and Cassandra Rizzuto sculpted one of the girls hair into a 6inch quiff and did some really creative work with tiaras. I think she has started a trend on wearing a tiara on the side

A beautiful cake was made by Fancy Nancy Cakes for the shoot and I was particularly taken with this company not only because the cakes are AMAZING, but because my little girl is called Nancy.
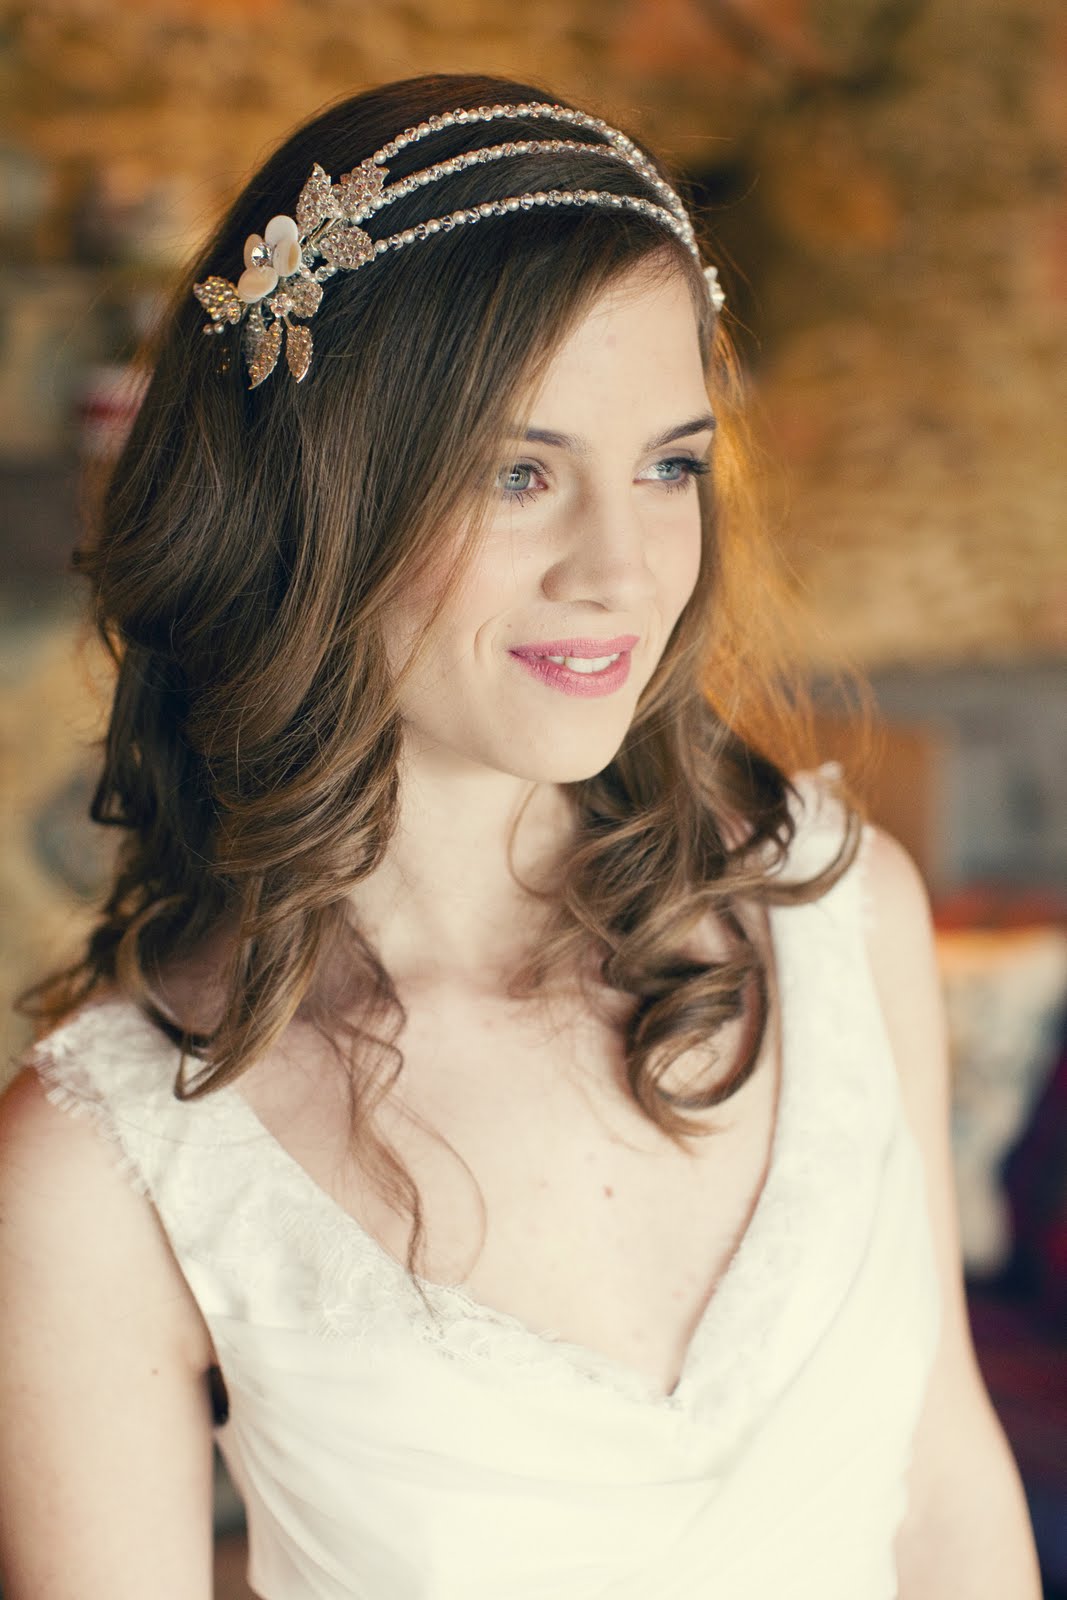
 Below are a few more pics for you to look at that I love from the shoot - let me know what you think of the make-up......


This last pic is in May edition of VOGUE, aren't we lucky!!! And this has just been featured on ROCK MY WEDDING have a look here http://www.rockmywedding.co.uk/lets-do-dallas-baby/
Back in March I was lucky enough to work with Craig and Kate from Craig Williams Photography on a shoot at Cliff Barns in Norfolk. Lauren from Adamo Bridal provided some stunning bridal wear and Cassandra Rizzuto sculpted one of the girls hair into a 6inch quiff and did some really creative work with tiaras. I think she has started a trend on wearing a tiara on the side

A beautiful cake was made by Fancy Nancy Cakes for the shoot and I was particularly taken with this company not only because the cakes are AMAZING, but because my little girl is called Nancy.




Subscribe to:
Posts (Atom)