Wednesday 23 November 2011

Quash Your Hands

As a Professional Make-up Artist I need to ensure my hands are squeaky clean and bacteria free before I even go near to anyone's face. I have tried loads of the germ busting products on the market but none as good as the one I am about to reveal.  I honestly find most of them really drying, very chemically and awkward to use (most are sloppy gel formulations - not nice)

The one I love is QUASH.  It is 100% natural and alcohol free - have a read of the Quash claims:


Key Claims:

  • Kills 99.9% of harmful germs > lab proven
  • Alcohol free > leaves skin soft & moisturised NOT dry or cracked
  • Safe for kids > uniquely formulated to be gentle on skin. Endorsed by the Skin Health Alliance.
  • Contains vitamins & minerals including manuka honey & aloe vera > to nourish your skin
  • Made in the United Kingdom
Our Hand Sanitiser Spray is ONLY made from 100% natural ingredients > free from chemicals 


This is a big shout out to anyone in the beauty, make-up, hair, salon industry.....in fact any industry - this product is safe, cheap (£2.99 for 50ml) and ruddy BRILLIANT. 


PASS IT ON 
PASS IT ON
PASS IT ON


Simone France - It's All About The Way You Clean Your Skin

Simone France skincare claims that great skin is all about the way you clean your skin. As my face has been so shockingly bad over the last year, I am about to put this to the test with my bespoke skincare routine package that was sent all the way from the US. Excited = yes!! I want the skin I had in my 20's again so let's see if Simone France can help me to achieve that.


A little in-sight into my face; my skin used to be flawless and spot free but since I had my little girl 18 months ago it has taken a huge turn for the worse and I suffer from those hurty / boily spots (I am sure some of you know them) on my chin area that are painful and... monthly - need I say more. It is generally dry, i.e. if I cleanse my skin and don't moisturise quickly, I feel like someone has stretched cling film really tightly across my face and left it there. 


Onto my first correspondence with Simone France. Firstly, I was sent a link to the Simone France Skin Care Analysis questionnaire which I promptly filled in truthfully and in a detailed manner so that Simone France could assess and therefore prescribe my skincare regimen. After a couple of days I received a VERY thorough response to my analysis describing that there are four main reasons why my skin is not as beautiful as it could be, in short they are as follows:


1. You are using a drying form of cleanser and not getting your skin optimally clean
2.  You are using foundation
3.  Lack of daily deep pore cleansing
4.  Drying up breakouts


(I just have to say that the email I received was so incredibly detailed AND personal, an approach which I immediately found amazing and have come to love - not many companies offer the service that Simone France does - I will come to that later)


Without going into too much detail of my own skin and skincare issues I just want to summarise what the four points above mean.  


1. You are using a drying form of cleanser and not getting your skin optimally cleanI was using a few different liquid and rinse-off cleansers which I thought I loved, but Simone France says they dry the skin and leave behind a thin film of product which can irritate and 'liquid cleansers are not good at removing oil, impurities or make up.  You need something with a bit of oil in it to dissolve these daily deposits.  Think about it - if you put your lipstick on and then drink water, the lipstick stays put.  But eat a few French Fries and it's gone!' (wise words from Penny Kjellberg).


2. You are using foundation - I almost shuddered when I read this! A Make-up Artist who doesn't wear make-up!!! In all honesty as a Mother and Make-up Artist I rarely wear foundation whilst at home when I am doing my day-to-day Mummy things, but I do wear it at work, I do test it out, I do use it to hide my spots, I do use it to feel glam and made up. So yes, I do use it, probably a bit more than I think I do. My assessment revealed that when I wear foundation and powder and use my typical 'drying' cleansers to remove it, it won't be coming off. With the method I've been using I was told 'Your skin is never clean with these products on them and over time the pigment builds up in your pores and causes uneven skin tone' - reading this made me think, really think. 


3. Lack of daily deep pore cleansing - Ok, I put my hands up, I don't deep clean my skin very often (I do my house and my clothes regularly, so why don't I do my skin?? hmmm) and Simone France believe that the use of mild exfoliation and deep pore cleansing is the key to beautiful skin. Sounds a bit daft but I have never really understood how to deep pore cleanse, how, if your pores are clogged and congested, do you get it out??? I guess the proof will be in the pudding, as they say! Simone France advised me that 'Once you start removing the dry skin that's building up and preventing further build up, and once you really get in there every day and clean out your pores from the powder and the daily accumulation of impurities you will very quickly see smaller pores, a velvety texture, improved tone and firmness, and a bright, glowing complexion'


4.  Drying up breakouts - YES, I am guilty as charged (according to SF) I have used all the bad things to try to zap my horrible chin spots, but have had little success. I was using a number of very drying spot lotions, oils and creams on the affected areas (the potions will remain nameless) but in actual fact they were making the problem a whole lot worse.  Whilst temporarily zapping the horrible spot, they were drying out my face and fooling my skin into thinking it needed to produce more oil... in fact I am going to hand you over to the description in my skincare analysis results.... 'Here’s why:  When you dry out your skin,, your body senses the dryness and its natural response is to try to fix the problem.  It does this by producing more oil.  You respond by applying more drying products and the cycle continues.  Soon you have created a hard dry surface and the oil gets trapped underneath where it clogs and stretches your pores.  Bacteria thrive in this environment and blemishes often ensue.   While it is natural to have a monthly breakout or two, once you start removing the dry skin that’s built up over time, and clean with products that don’t dry you out, you will very quickly see the blemishes lessen and in all likelihood disappear'.


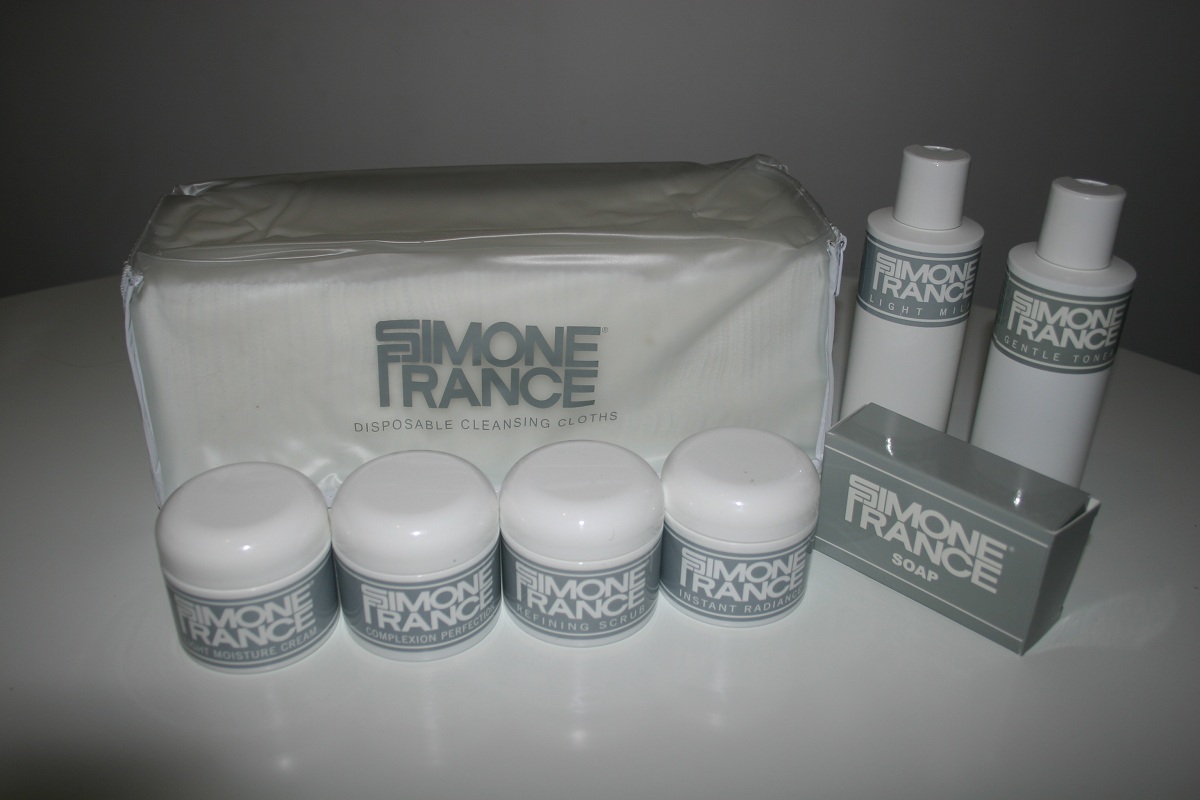
5 days after I received this email I was sent my goodies and that evening at precisely 7:30pm, just after my daughters bed-time, I cracked on with my regimen.  Below is a pic I took of my products:


(clockwise from back left)
Disposable Cleansing Cloths, Light Milk, Gentle Toner, Soap, Instant Radiance, Refining Scrub,
Complexion Perfection, Light Moisture Cream 


You can click here to read more about each product.


Also in my email was a clear guide on how to use them.  This has always been my problem with 'off the shelf' skincare products, no-one advises you how to USE them. This is where things have changed for me.


Here is what we (SF) recommend for you:

Every morning clean your face with The Sandwich for Normal to Oily Skin. Make sure you follow the directions exactly as the method is just as important as the products used. You will be using soap, which will get your skin cleaner than any liquid cleanser, but when used in our unique way it will never dry your skin. The Refining Scrub will gently remove the dry surface that's built up and deep clean your pores, and you will be wiping everything off with Disposable Cleansing Cloths so nothing will be left behind to dry or irritate or dull your complexion. You won't believe how fresh and clean your skin looks and feels after washing this way each morning. Moisturize with the same Light Moisture Cream you used to wash with, or with Parasol SPF 15.

Every evening clean your face and remove your makeup (eye make up too) with Light Milk and Gentle Toner.  Remove both with the same Disposable Cleansing Cloths you used to remove your Sandwich. Moisturize with the same Light Moisture Cream you used in your morning Sandwich only if your skin feels dry

A few times a week use Instant Radiance exfoliating treatment followed by Complexion Perfection mask. This powerful duo will really speed your results, refine your skin texture and bring on that healthy glow.


----


My skin has been analysed, now it is my turn to tell you my analysis of the Simone France skincare range.

Quite simply ... I love it. I have to tell you that my skin feels clean, my skin feels fresh and my skin feels young! I must admit I had a wobbly start to it and about 2 days after the regimen, my skin was bumpy and slightly sore! DON'T PANIC THOUGH! I immediately wrote a detailed email to Penny and she revised my products there and then and shipped them from America that very day! It turns out that the 'light moisture' was just too light for me. As England turns to winter the air has a nip to it and my skin truly suffers as a result, this was taken on board by Simone France and my moisture was adjusted accordingly. What skincare brand do you know that consults even after purchase? answers on a postcard please.

My favourite part about the regime is The Sandwich.  I have always loved the squeaky clean feeling of soap, but hated the drying feeling that comes with it which is where The Sandwich cleverly comes in. Each morning I moisturise, gently scrub and then soap my face - yes! all in that order and it feels gorgeous. I follow this with 'Lovely Glow' as through a bit of trial and error this is the right moisture for me. I sometimes use the 'French Formula' but only when my skin feels a bit parched and in need of a bit more moisture love.

I have to admit I still use foundation (but no powder which is SF's biggest No-No) but I cleanse it away properly in the evening. I also have to admit I am still getting the 'monthly' spots which are driving me a little bit insane, but I know why these are occuring and they are clearing up faster without my skin-dryingly-skin-blastingly awful home spot remedies.  

I also took it upon myself to interview Penny as I had a few questions of my own for her, they make very interesting reading and they make me love the brand EVEN more.

How long do you advise people to use Simone France for until they see proper results?
1.  Most people at least feel the difference the first time they use The Sandwich.  Within 2 weeks there should be a noticeable improvement, and the longer you use it the more results you will see.  Once in a while some people can break out for a day or two as things come to the surface, but that isn’t the norm and that soon goes away.  The results are really very fast, because the products and the method work with the skin’s natural processes, instead of trying to overtake and control them.

Why did Simone sell her company?
2.  Simone still has her facial business, the same one she’s had for all her life.  She and I started the product company together in 1999, and her interest in that is what she sold in 2006 that Sally, Jean and I now own.  She is in her 80s, a very private person, and prefers at this stage of her life to just work one on one with people on facials, instead of having the pressure, work load and visibility of a big product company.  The facial business is as it always has been – just her, no receptionist, no other facialists.

Why is it not available in regular shops / stores?
3.  We used to be in Bergdorf Goodman and Nordstrom, but we prefer being an on-line only company.  There are many reasons why this is better for us and for our customers as well.  On line we  deal directly with our customers, one to one.  Our end customer is the woman washing her face every morning and it is important we keep that direct connection.  When you sell to stores, your end customer is the store – you have to do things their way, put their needs ahead of all,  and there are any number of salespeople between us and the end customer.  We can run around the country doing our best to train them, but it will never be the same as dealing directly.  It’s better for the customer, and it is better for us because we always have our finger on the pulse of what our customers need and want, how they are using and liking the products.  In our case, we also have the added issue that we are so very different from every other company in both product and philosophy.  It is difficult to ask the same facialist or salesperson to tell people they shouldn’t use liquid cleansers or chemical exfoliants, or powder, when they have to sell liquid cleansers, chemical exfoliants and powder in order to keep their jobs in their stores and spas.  Simply put, we don’t fit in with the crowd that is in stores and spas.  And, frankly, we don’t want to!  The reason people see such good results with our products is because we give them something no other product company does.


How and why are you different from all the other skincare ranges out on the market?
4.  How and why are we different – let me count the ways!  1.  We use the fewest, simplest ingredients possible  2.  We have a method that is just as important as the products used – if you use our products the same  way others are made to be used, you won’t get the benefits.  3.  We have a unique view of skin typing and diagnosing  4.  Rather than selling people more and more things to apply to their skin, we say that you should use less.  And 5 is perhaps the most important.  We do not follow trends – we remain true to the formulas and method Simone has used, hands on, one on one, on thousands of women for decades.   We know these products and this method works.  Unless and until that changes, we’re not going to change what we say or what we sell.

Who set the skin analysis questions? (when a customer first applies)
5.  The analysis questions have been the same since Simone and I started the product line company in 1999.  The questions were written by me (a former beauty editor and beauty publicist), after working with Simone and seeing her diagnose hundreds of customers.  These are the questions she herself asks.

How long should a full sized set of SF last a customer?
6.  Full sizes last 2-3 months, although if you are only using it on your face the soap will last much longer than that.  

What 3 things should anyone do to achieve glowing flawless skin, for life?
7.  Three things to do for a healthy complexion for a lifetime are:  1. Physically block the sun from your skin with a hat, a parasol or staying in the shade.  2.  Clean your skin twice a day.  One surface cleansing and one deep pore cleansing and mild exfoliation  3.  Respect your skin and do not try to beat it into submission with strong chemicals and procedures – do not try to “fight” wrinkles, “zap” zits, etc.  If you go to war with your skin it will only show you battle scars!

--------

I went away with my husband for my first anniversary and took the entire range with me, this is it in our hotel cabinet - I never travel lightly.

My small skincare kit!!! :)


SUMMARY


Would I buy it? YES! (I don't think there is a font big enough for this)

Would I recommend Simone France to friends, colleagues, clients? YES YES YES!!

As a bridal and fashion Make-up Artist I am asked about skincare all the time, I am not a dermatologist / skincare expert so do find it hard to recommend things that are right for the individual.  With Simone France I can recommend the regimen and then they will do all of the analysing and the advise - hurrah. At the beginning of this post I briefly mentioned the service that Simone France offer and I have to say this is second to none. The service was really personal, very effective and it's customer care that is OUT OF THIS WORLD!

If you want to ask me any questions about my experience of Simone France skincare please do via my website www.lucybakermakeup.com  or email through to Simone France themselves information@simonefrance.com.

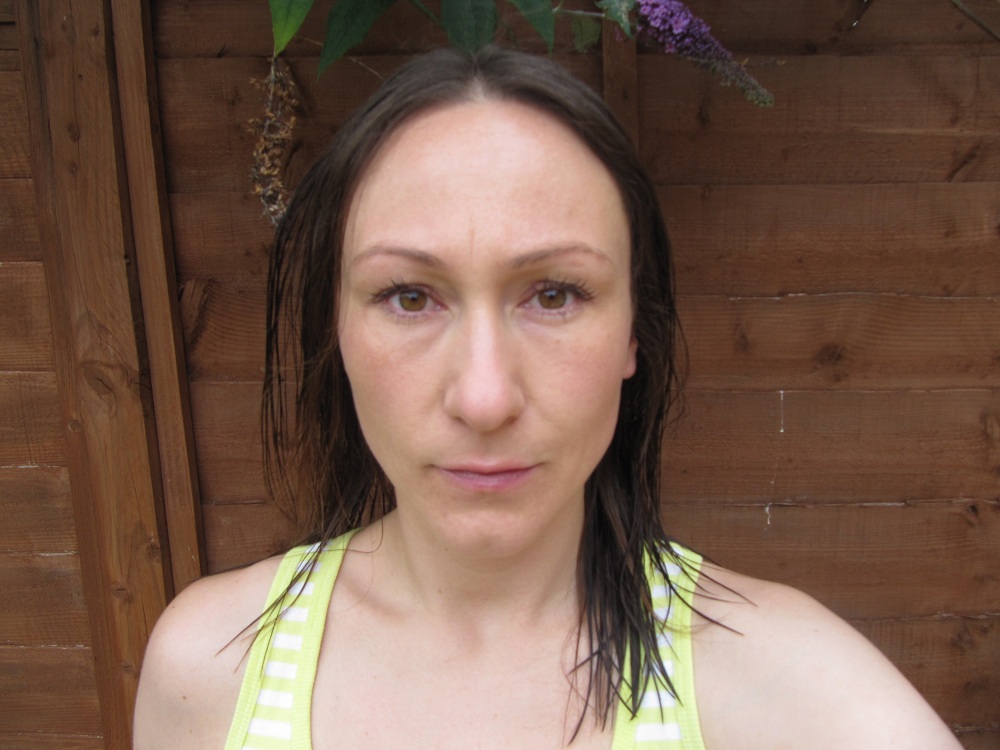
Here is a piccie of my skin, with a bit of party make-up I have to add, but doesn't it look clear and glowing? - I think so. 

Hardly any foundation - and NO powder! 


Lots of Party Make-up :) - but still, no powder


What is your skincare regime? Please comment below as I would love to hear! 


NB - My skincare test was over a 6 week period (to date)


Simone France Product Ingredient List click HERE

Thursday 17 November 2011

Have a sniff!


The best candles I have ever, ever sniffed are by an Australian company called Sniff Soy Candles and they truly are unique in that they actually smell exactly like they say they should - a rareity.  I was in Liberty a few weeks ago and did a proper smell test of most of the candles in there, which I have to add ranged from £25 to £75 (for a candle!) anyway, I came away thinking that a lot of them smelt nice but none of them had a scent that would linger and fragrance a room properly.  

I have been very lucky to get my hands on 3 candles all the way from Australia; Rose Bud, Fresh Cut Flowers and French Verbena. See them on the website here 

I can honestly say that they smell adorable, French Verbena is my fave, and they retail at only $29AUD which is about £18. A whiffing sniffing bargain!


Mine are branded too - so I have the only Lucy Baker Make-up Sniff Candles in the world! :)

Thanks to the Sniffettes for sending these over to me to try.

x

Monday 7 November 2011

My favourite lipbalm EVER EVER EVER

I am a total and utter lip balm addict and can confess that I have bought nearly every single one on the market over the years and I can also confess I have loved.... just about none of them. Too greasy, too expensive, too slippy, too smelly, too this and too that and none have been right - UNTIL NOW.... I am too excited about telling you about this product as it is a great price, a great product and it stays on! hurraaahhhhh.  Plus is is SPF 15, available on the high street, organic, super conditioning and and and....... ok.....here it is
THE BEST LIP BALM IN THE WORLD - according to me


It is from Holland & Barrett and is just £3.25 for a 5.7ml tube. My advice to you is GO OUT AND BUY IT AND THROW ALL YOUR OTHER RUBBISH LIP BALMS AWAY!


The End

Saturday 22 October 2011

A little look at make-up prep on a photoshoot

I did a photoshoot today using a lovely model called Olu. The photographer, Hannah, chose her because she has a truly amazing face that she knew would be just PERFECT for our shoot.  My make-up brief was to focus on the lip, using glitter, heavy glosses and bright colours to accentuate Olu's amazing smile, so of course I 'went for it' whilst keeping the skin natural and glowing and the eyes kinda natural.

The snaps below are just a few of me doing the make-up - the main shoot images will follow very soon. I'll list the products I used at the shoot on my blog when I add the finalised images.


NOW THAT IS GLITTER!!!


And here is Olu in the finished images:-


Base; MAC Face & Body

Friday 23 September 2011

My Make-up Today - quick and easy is the name of the game

As a busy Mummy to a little girl I often need quick and easy make-up that stays on really well through food fights, tears (mine and Nancy's) and the everyday mishaps that are part of the kind of days we have at home together when I am not working.

I did my make-up in 10 mins flat this morning whilst Nancy was amusing herself on our household trampoline (our bed) and I thought as I was doing this I would share with you the products I used and a quick overview of how I applied them.

Moisturiser: Oilatum Natural Repair 
Foundation: Bourjois 10 Hour Sleep Effect ; colour 74 (apply with fingers and latex sponge to smooth)
Brows: Laura Mercier Eyebrow Pencil colour; brunette
Concealer: Laura Mercier Secret Camouflage  colour; SC3 (only apply as spot/blemish cover-up)
Blush: Shiseido The Make-up Blush Duo colour; pink (rose nature)
Eyelash Curlers: Shu Uemura Curlers (curl top lashes)
Mascara: Leichner Waterproof mascara colour; Jet Black (3 coats top and bottom)
Powder: Origins Brighter By Nature Skin Tone Correcting Make-up colour; 4 Light/Warm (sweep a tiny amount over skin with a fluffy brush at the end of your make-up)

Remember this is a quicker than quick make-up.  I didn't use any colour / pencil on my eyes as a good eyelash curler and 3 coats of mascara gives me that wide awake look. Put it this way, if I bumped into Ashton Kutcher in the street on my way to buy some eyelashes or nappies, I would feel groomed, confident and glowing and ready to accept a lunch date from him!

Tuesday 20 September 2011

Adult Spots - How To Effectively Cleanse

Over the last few weeks my skin has taken a turn for the worst :( I have big spots on my chin area -which are often related to hormones - so I wanted to share with you what I do to help my skin heal.
As soon as I feel that bruise feeling on my face I kick start my Super Cleanse Skin Routine and keep my fingers crossed for speedy results and for the horrendous spots to vanish!


Super Cleanse Skin Routine

Firstly I remove all traces of make-up with Liz Earle's Cleanse & Polish Hot Cloth Cleanser making sure I use the muslin cloth very gently over the bad areas and with tepid, not hot, water. It is important to say that when my skin is bad I don't wear foundation unless I am going out.

Secondly I boil the kettle, grab a large plastic mixing bowl, a large clean towel, cotton wool, my Avene Toner and a bottle of tea tree oil. 

Face Steam Process:

Fill the bowl with the freshly boiled water and add 5 drops of tea tree oil, swish round and leave to cool for 3/4mins.

Tie your hair back and place your head 4 inches above the water level and cover your head with the towel - hold the towel around the neck area so no steam can escape. 

Steam your face for 3 mins. 

After this first steam session soak a cotton pad with your usual toner (I use Avene Gentle Toner) and tone your face all over.

Top up the water with more boiled water straight from the kettle and repeat steaming your face for another 3/4 mins.

Cleanse your face with your toner again and pat dry with a clean towel.

If you need to squeeze the spot (steaming will ripen the area, sounds gross but it is true) use a very fine pin or needle to ease the spot out but it's essential to sterilise it in boiling water or a dettol/tcp solution first as you do not want to infect the area. DO NOT POP THE SPOT WITH YOUR FINGERS - this ruptures the skin and creates a scabby spot and even worse, scarring.

Wait for 10 mins and moisturise and apply tea tree oil to the spot/s using a cotton bud.

Steam every other day until your skin clears up and continue to steam your face once a week for the rest of your life! - who said being a woman was easy?!

Tuesday 13 September 2011

Michelle Ganz's Wedding Morning

Michelle first contacted me back in November 2010 with an enquiry about having her make-up done for her wedding in August 2011. It seemed such a long time away back in November but a few weeks ago was Michelle and Darren's wedding day and I was honoured to make her and her bridesmaids up for her big day. Her wedding took place at the Runnymede on Thames Hotel in Surrey and the view from her room was a beautiful and busy River Thames with barges and boats cruising along it - just gorgeous!

We had two make-up trials over the months leading up to her wedding day and we really perfected her glam, but bridal look that made her really stand out in her fantastic dress and great hair by Rebecca Wakeman - think red carpet chic mixed with beautiful bride and you can imagine how incredible she looked when we had finished!

I have a selection of photos for you to see (non official ones) so take a look and let me know what you think. I will post some official ones soon when Michelle gives me the nod!

Few hours to go until hair and make-up, so just relaxing (and posing!) 

View from the hotel window; a very British game of croquet by the Thames

Just about the leave for the ceremony

A real red carpet snap!

See what I mean about ultra chic........

Working with Michelle Ganz, now Lee, was an absolute joy from beginning to end.  I enjoyed her relaxed nature immensely and her organisational skills were second to none throughout the whole process and I loved it how she kept me in the loop with decisons she was making.  Michelle's skin is just so beautiful to work with too, she has a great skincare routine and went for regular facials with a trusted beautician for many weeks before her wedding day and this paid off enormously.

Many Happy Returns and Mazel Tov to Michelle and Darren and may you have a brilliant and happy marriage together.

x

Sunday 11 September 2011

Hen Do Heaven!

Last night I made up 5 (of 15) hens at an amazing Essex mansion in Little Laver. You can see the superb mansion on this link : Essex Mansion

They had a TOWIE theme to the weekend and last night (Saturday) they headed to Faces in Gants Hill for a Totally TOWIE night out! I was booked as the make-up artist to the Hen + 4 and I turned up at the house armed with glitter, eyelashes and lots of shimmer. 

See the pics below and see if you can pick out the 5 girls who had some Lucy Baker Make-up love:


A few pics of me in action too:

Painting George's face

Busy Hair and Make-up dept at the mansion

My final make over before they went to FACES nightclub

Friday 19 August 2011

Three Products I Love At The Moment

This is just a short post to feature some products I currently love:


1) SANCTUARY Youth Boosting Warming Microbrasion Polish
http://www.thesanctuary.co.uk/youth-boosting-warming-microbrasion-polish-details.htm
I have used this 4 times now and already my skin looks newer, cleaner and polished.


2) Almond Oil
I buy this from Holland and Barrett and use it on damp skin (instead of body moisturiser)
as it is natural and really hydrating and CHEAP at around £3.00!


3) MANDARA SPA Island Paradise conditioning hand lotion
http://www.timetospa.co.uk/bath-and-body/hands-and-feet/Mandara-Spa-Island-Paradise-Conditioning-Hand-Lotion/
It smells utterly divine and the 300ml bottle will last ages.  It was half price in Sainsbury's and I love it!!


Megan's Wonderful Wedding

On 16th July 2011, I made up Megan for her wedding day in a lovely place called Bishampton, Worcestershire. I did Megan's trial in London about 6 weeks beforehand and within 2 hours we nailed her look.  My brief was that she wanted to look summery and fresh, but with an element of glamour - which I hope you'll agree with when you see the picture below - we managed.

When I first met Megan I really thought she looked like Sienna Miller, what a lucky girl! Her skincare regime was really finely tuned and this showed in her skin as it looked and felt firm and hydrated. A great start for me as a make-up artist.....

Megan's wedding was at a local church in Bishmapton where her parents now live and her reception was in their fabulous garden.  She wanted a summer garden party with a vintage feel and even though it rained all morning during the preparation and pampering - the sun shone for her at the right time.  I always say the sun shines for good people and this was true for Megan and her then Fiance, Will.

Have a look at the pictures of Megan's wedding below.  Her just got out of bed hair and her INCREDIBLE lace vintage style dress made her look a million dollars (which is probably what Sienna Miller would spend on her wedding!)

Making up Megan's Mum

Starting on Megan (the sheet is covering her fabbo dress)

Just us two and time for Megan to reeeelax

Pretty much done, just the hair to finish

Megan is ready. Gorgeous bridesmaid dresses aren't they?

Wonderful image of the wind blowing Meg's veil

Megan and Will 

In the vintage campervan! Super cool 

Not sure what she sang here, and is that Will on drums???

Lucy Baker Make-up

Monday 25 July 2011

Photoshoot for Sam Simmons

Sam Simmons is a Presenter and a Model and a very good one at that - she has masses of energy and a radiant smile and FABBO skin, which you will see in the images below. I have worked with her a few times and was delighted when she asked me to do her make-up for a recent portrait shoot with Philippa from Newland Portraits.

As Sam's skin is sooo great she didn't need much base or concealer and my job as a Make-up Artist was to enhance her natural beauty, not change it. See the pics:


Products I used on the shoot:

Skin: MAC Face and Body - C6 and 7 (mixed)
Laura Mercier Secret Camouflage Concealer - SC6 pallette

Brows: Benefit Instant Brow Pencil - Deep

Highlighter: BECCA Shimmering Skin Perfector - Topaz

Cheeks: NARS The Multiple - Maui

Eyes: MAC eyeshadows - mix of neutral colours
MAC Pro Lash Mascara - Black

Lips: mixture of lip colours from my existing palette

Powder: Laura Mercier Loose Powder - Translucent

Friday 8 July 2011

My Three Fave Products (July 2011)

I just wanted to post something about three products I am currently loving at the moment.

1) Boots No7 Cleansing Body Polish - I use this every 3 or so days with a tiny amount of water for the full exfoliating effect. It leaves the skin smelling incredible and there is no real need to body moisturise after use. Gorg.

2) First Aid Beauty : 5-in-1 Face Cream SPF30 - I love this cream.  It smells nice, goes on really well and does so many miracle things! Unlike so many moisturisers with SPF it doesn't feel like a suncream and have that bitter smell that they tend to have. It doesn't have parabens or nasties in it either. Buy it in Boots.

3) Solar Oil - I always seem to be going on about Solar Oil, but it really is great. My nails are usually flaky and dry and with constant use of this oil, they aren't! Tip: you need to put it on as much as you can, morning / noon / night / after washing hands / after housework / bathing the kids etc - it will last ages so don't worry about it running out. Search online for the product or buy it at one of my fave online stores, Cult Beauty.

If you try them let me know what you think.  Also, if you have any products that you currently love, let me know them too!

Thursday 30 June 2011

Grow Baby Grow | HD Brows

Emily Ash of Browns Loughborough recently sent some products for me to try to help with my over-plucked / under-fashionable eyebrows and I am currently in the middle of a trial. 

I'm testing out 'Grow Baby Grow' which is an HD Brows product formulated to help eyebrows grow back to their former glory - it encourages rapid growth by increasing blood circulation to the area and provides essential nutrients.  As my eyebrows have taken a bit of a battering from my tweezers over the last..... oh gosh.... 18 years! I feel now is the time to give them some love and to show them I mean business. 

The photos below show my eyebrows before using any of the product and four days afterwards.  Over these four days I have made a thorough application twice a day making sure I cover the sparce areas carefully and painting on the clear gel above and below my natural eyebrow shape.  The product has a really fine brush (almost like a liquid eyeliner brush) so application is easy and as it is a gel, it's not at all messy either.


Before ANY Grow Baby Grow Application

Day Four of Grow Baby Grow Application (excuse the wet hair, I am a busy Mum!)
I have a habit on this site of posting THE most unflattering photos of myself, but to see things properly sometimes it is necessary.  I do think that my brows feel thicker, I really do, but is this because I am not tempted to pluck at all as this would jeopardise the test? - not sure. I wasn't really plucking them anyway as I have been trying for about 5 months to grow them, without much luck I must add, maybe Grow Baby Grow is working it's magic after just four days :)  I will take a pic again in another four days and add it to this post but in the meantime, do you think my brows look thicker? (no make has been used on my brows at all).

After this trial is over, I think the next step for me is the full HD Brow treatment - I want to be tinted, waxed, threaded and plucked to perfection too, just like the celebs!


Four Days Later..........(8 days into trial)


4 days later (same photo position and time of day)

4 days later (taken inside, shows brows in a better light)

They are definitely getting thicker. I have increased the application of Grow baby Grow to twice a day and will keep going.  These pics show my brows with NO make-up and NO dye.


A special THANK-YOU to Browns Loughborough.

Shiny Shellac from CND (Creative Nail Design)

This morning Rowena from Sei Bella Nails & Beauty came to my house to tackle my (and only I am allowed to say this) dry flaky finger nails and my VERY dry and neglected feet.  After a consultation over email where I told Rowena I am a Mum to a busy toddler and a make-up artist where my hands need to look lovely and presentable she recommended Shellac nails for me and I jumped at the chance.

My nails before any treatment


First of all Rowena gently filed my nails and attended to the cuticle area to create a smooth base for the Shellac to go on to. She then applied a coat of the CND Shellac base coat and this was allowed to set under the UV lamp for just 10 seconds.


Base coat has been applied and under the UV lamp for 10 secs

After the base coat she applied a layer of CND Shellac 'Cocoa' to each nail and each hand was placed under the UV lamp for 2minutes - the process was then repeated so that two coats of the coloured polish were on each nail. Even without the top coat my nails gleamed and glistened in the natural daylight. 

Check out the final look. I totally love this colour, do you?

CND 'Cocoa' - the finished look

Watch this short video from CND about Shellac http://www.cnd.com/Products/Color/shellac-video.aspx

My toes were done in much the same way but instead of 'Cocoa' I opted for 'Wildfire' which is a vibrant but traditional red - see the images below


Ta-Daaaaa. My finished CND 'Wildfire' and luxury pedicure


I think I need to tan my feet / legs now I have these fab nails :)
 For the luxury pedicure Rowena used the following products in order. It was so wonderfully relaxing but could have been more relaxing if my 14m old toddler wasn't jumping all over me and Rowena and trying to hide all of her products!

CND Luxury Marine Spa Pedicure

1 - Mineral Bath Sea Soak
2 - For exfoliating legs - Marine Salt Scrub
3 - Exfoliating base of foot - Sea Scrub
4 - Solar Oil and cuticle eraser on nails and cuticles plus Sea Serum on hard skin patches
5 - Marine Cooling Masque
6 - Massage with Marine Hydrating Oil
7 - Cucumber Heel Therapy Cream to finish

I have to say as I sit here at my computer I can smell wafts of the CND Marine products that Rowena used and it is making me feel really relaxed.  The foot massage skills that she has too are fantastic, she is firm but fair and I even stopped talking for about 4 minutes which means she really must have hit the spot!

One of the products that she used I already had and have recommended it to countless people over the years, this is Solar Oil. I buy this from Cult Beauty but there are lots of places online to get it from. It works so well with Shellac (which was new to me) as it penetrates through the formula and conditions your nails, it also conditions the cuticle area wonderfully.  Rowena recommended buying a few tiny bottles of it (which she sells for £4 each) to keep in your bathroom, kitchen, handbag etc - this way you have no excuse for not applying it. I thought this was a simple but brilliant tip as I often can't find mine so I don't use it, hence the flaky dry nails I normally have.  Solar Oil is £11.95 for a large bottle, but will last forever.

I would recommend Rowena without a doubt but I do have one very minor minor point to make: I do think that the edge of the nails could have been cleaned up a tiny bit more than they were so that there was no colour on the skin but I honestly don't think of this as a criticism of Rowena, I truly liked her and her work was good! I will post some more pictures of how they look after two weeks so you can see how they wear.

So if you live in London email Rowena at info@seibellabeauty.co.uk for a consultation and quote.

My daughter Nancy and Rowena The Shellac Queen!

ONE WEEK LATER


Well, it's 8 days later and unfortunately due to the Shellac peeling off on 2 nails I had to remove it.  The method I used was to soak a cotton pad with acetone (check the ingredient list on your nail varnish remover for acetone) for each finger, therefore x10.  I wrapped the pad around each nail and wrapped it tightly with a square of tin-foil - it sounds a bit weird and it also looks a bit weird, I felt like Edward 'Tinfoil' Hands!  Leave for 10 minutes.  When the time is up, remove one of the wrappings and scrape off the Shellac using a wooden nail stick. If there are any stubborn bits of Shellac, use one of the already acetone soaked pads to gently wipe over the nail until it comes off. Repeat for each nail.  After rinsing the hands with soap and water dry and generously apply Solar Oil to each nail and massage in. Do this as often as you remember for the next 48hrs.

Summary - I loved the look and feel of Shellac, but it didn't last for the 2 weeks. I used gloves for housework and applied the recommended Solar Oil at least 4 times a day, so I am not really sure what went wrong.  It wasn't cheap either so I don't think I would have Shellac again in a hurry, I'm going to stick to my OPI and Barry M colours!